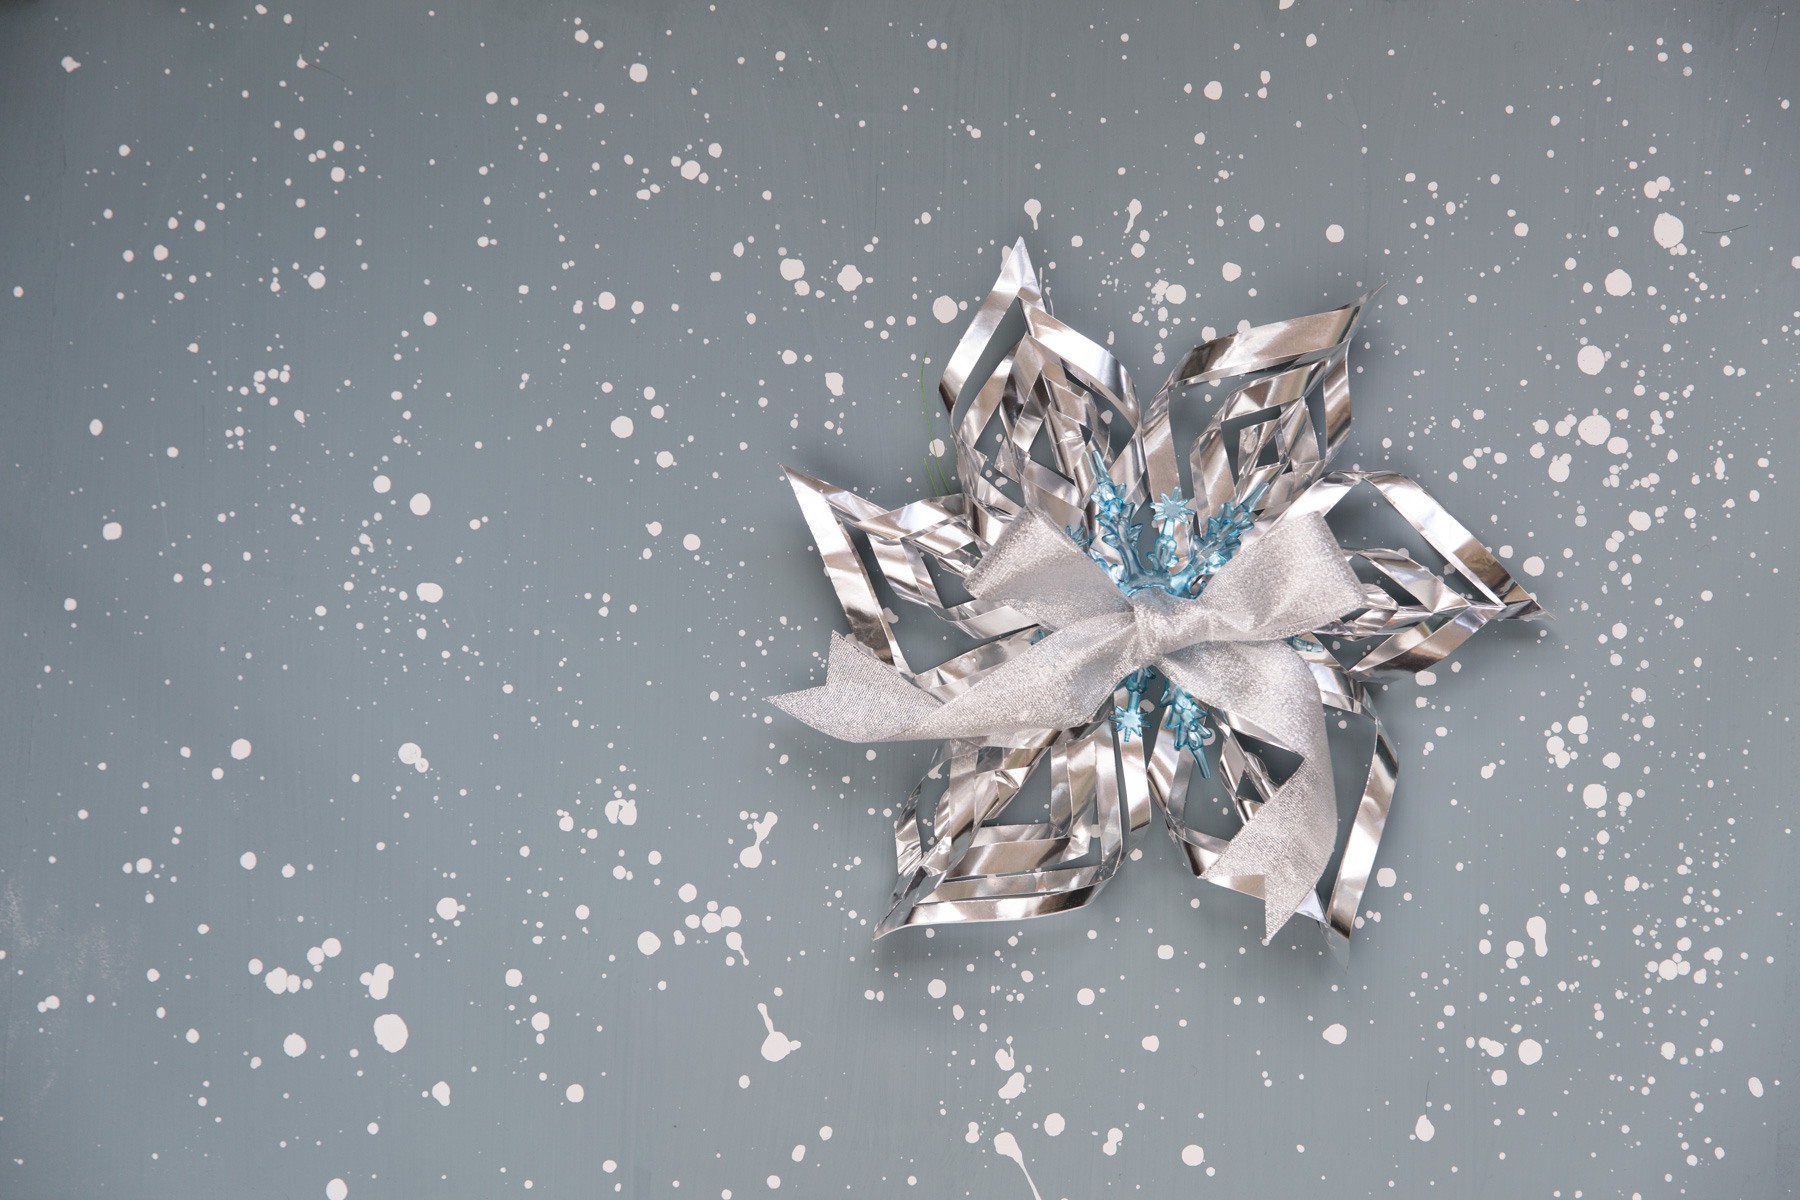
This elegant 3D snowflake decoration will look amazing hanging on a Christmas tree. It’s created by Erin Hung of paper goods company BerinMade and if you like this project, there are many more paper decorations to make in Erin’s book Paper Parties, out now.
Difficulty Level: 3 out of 5
Materials/Tools:
• Silver or Gold Metallic Paper x 6
• Plastic Snowflake Ornament
• Green Floral Wire
• 2” Silver or Gold Ribbon
• Scissors
• Glue/Double-sided tape
Method:
Step 1:
Take one square piece of paper to fold in half diagonally, and then in half again diagonally. Make note of where the folded “bottom” of the triangle is.
Step 2:
Hold the folded triangle in the position demonstrated (illustrated blow). Make 4 vertical cuts upwards like the dotted lines, leaving about 1.5cm space joined at the top.

Step 3:
Unfold the triangle, and rotate the square 45 degrees so that it sits like a diamond. Roll the first two innermost paper lines together to form a tube. Glue and secure these two pieces together. You should see triangle shapes on each side of the roll.
Step 4:
Flip the diamond over to the other side. Take the next two paper lines and pull them together on the opposite side of the tube and tape together as before. This will be a more rounded shape and wider than the first tube.
Step 5:
Keep turning the paper and gluing the paper lines together on opposite side in the same way until all paper lines have been joined.

Step 6:
Repeat steps 1-6 with the remaining 5 pieces of paper.
Step 7:
You should be able to assemble the shape of the snowflake by pointing all the segments towards one centre point. Hole-punch about 3cm into the tips of the segments. Using a piece of green wire, join through the holes and twist the two ends to secure the snowflake shape.

Step 8:
Staple where each of the six arms meet. This ensures that the snowflake shape is pulled into place.

Step 9:
Laying a piece of ribbon about 70cm long horizontally across the table, place your snowflake on top. Bring both ends carefully towards the centre, being careful to thread through between the segments.

Step 10:
Holding where the ribbon meets at the top, thread your snowflake ornament through so that it sits in the centre of the snowflake.
Step 11:
Tie a bow with the ribbon to secure the snowflake. Cut off excess on both tails and lightly curl with scissor edge to finish!

Find more projects by Erin in her book Paper Parties, out now.
Pattern © BerinMade.